如何:泥干墙
Achieve flawlessly flat surfaces on your construction project with this materials primer and step-by-step guide.
照片:IstockPhoto.com.
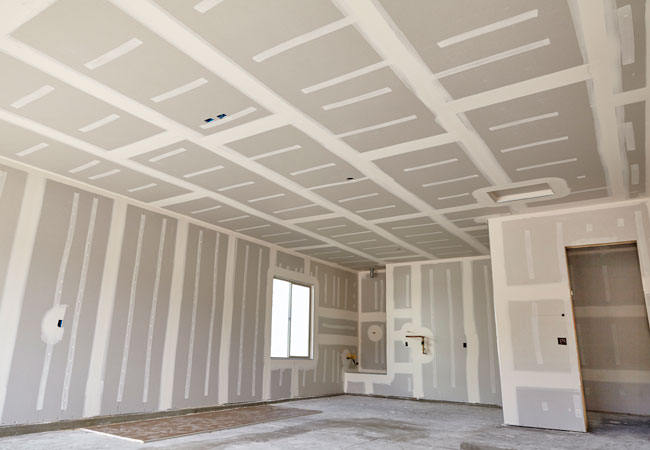
“泥泞”,将多种薄层的干壁化合物涂覆到的过程joints并拧紧新鸿的干墙,听起来凌乱 - 它是。但是在正确完成的时候,结果是墙壁,如此平坦的是,很少有观察者可以发现下面的接缝。
虽然专业的Drywall Tripers使任务看起来很容易,但是善家发现它需要实践,技能,当然 - 作业的正确的东西(在这种情况下,泥浆本身和防止裂缝出现的磁带在接缝中)。本指南将为您提供主题,以及如何踩泥墙的逐步指导,因此您会感到自信,不像你必须混淆!
首先,了解干墙泥浆类型。
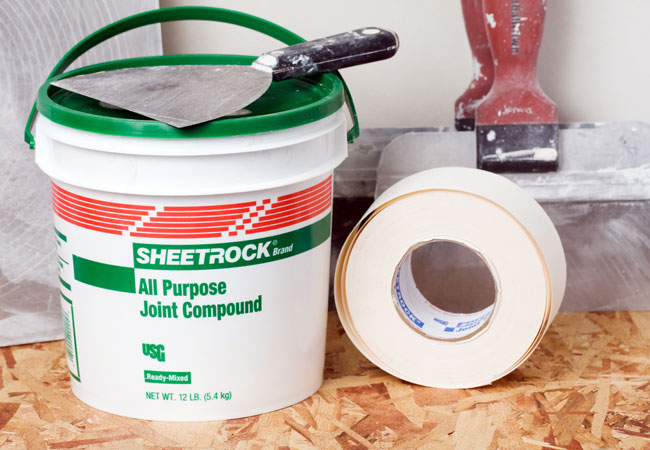
The two basic categories of drywall mud, “premixed” and “powdered,” are available in a handful of additional options that can make it tough to choose the right product when faced with a dozen different types in the DIY store.
Premixed
预混合的联合化合物就是这样:泥浆已经与水混合到平稳的一致性,并准备好应用。但在该类别中,你会发现“通用泥浆”,“顶部泥浆”和“轻巧,通用泥浆”。
- all顺利进行,并在几个小时内开始硬化,这取决于房间里的温度和湿度。它适用于所有泥浆应用,所以如果您是一个泥泞的新手,请使用这个。
- 顶部泥用作最终涂层。它干燥到明亮的白色,很容易沙,使其成为墙壁的良好选择,将涂上浅色。顶部泥浆的粘附性较少,而不是通用泥浆,所以它不适合第一和第二种外套。
- 轻质通用泥浆也可以在较轻的阴影中,适合墙壁的墙壁。一些专业专业专业专业用途为第一个泥浆应用使用,然后切换到第二和第三应用的轻量级通用泥浆。
粉
粉状干墙泥浆,也称为“泥浆”或“热泥”,含有在加入水中以加速硬化时间时反应的化学品。这种类型的泥浆倾向于缩小到所有目的预混泥浆,但它开始迅速硬化。快速设置泥浆适用于预填充大型间隙或在开始实际搅拌过程之前在压碎的干墙角上平滑。
Advertisement
- 蒂姆ed drywall mud:设置泥浆被标记为最大在它硬化之前必须使用它的时间量。您可以选择5分钟的泥浆,20分钟或更长的硬化时间,具体取决于您的需求。如果使用设置泥浆,只需尽可能多地混合,并在您工作时经常清洗工具。
- 易于砂设置泥:某些类型的炎热泥浆的化学物质硬化为墙壁上的岩石状脊状,你可以花几个小时试图散发它们。通过选择易于沙砂品种来避免这一点。
照片:IstockPhoto.com.
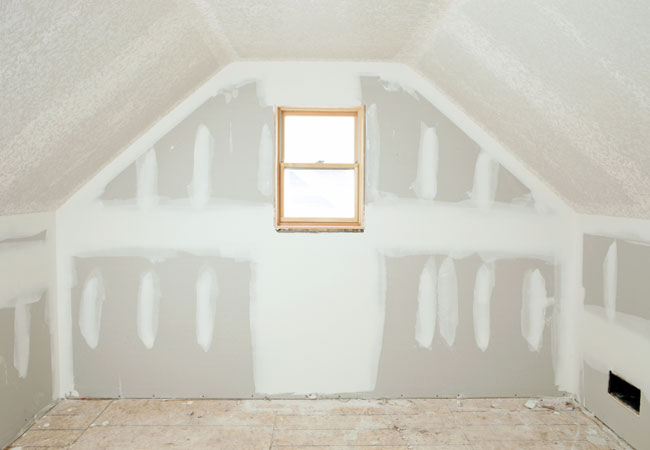
Then, understand the types of drywall tape.
During the mudding process, tape acts as a bond to keep the finished wall from developing cracks along the drywall seams. The different types of tape are “paper,” “mesh,” and “preformed”—and all three have their pros and cons.
- 纸带is used almost exclusively by the pros because it’s very thin, which helps create imperceptibly smooth joints. Paper tape comes with a crease down the center that allows you to bend it along the crease to form sharp wall corners. It takes practice, however, to correctly bed paper tape in the first coating of wet mud without creating bubbles underneath.
- Mesh tape由玻璃纤维螺纹制成,采用开放式图案,背面粘合。虽然在干燥的关节上定位网状胶带相当简单,然后在顶部涂上第一层泥浆,网格胶带比纸带厚,并且可以在墙壁涂漆时导致更明显的关节。
- 预先形成的磁带也称为预成型的“拐角”,可以由纸,塑料,薄金属或材料的组合制成。它用于外墙角落,实现光滑,均匀的外观。一些预先成形的角落需要钉子,而其他成形的拐角需要粘合剂。如果您不相信您可以使用普通纸磁带成功磁带,请尝试预先形成的磁带。
照片:IstockPhoto.com.
现在,你准备学习如何泥干墙。
Primed with an understanding of mudding materials, it’s time to familiarize yourself with the process as outlined here. Because paper tape offers the most professional results, we’ll detail how to mud with paper tape. If you’re using mesh tape, you’ll find some tips below that will help you use it correctly.
第1步:保护地板和你自己免受干墙泥溅物。
用帆布滴布(塑料滴布可以变得危险的光滑)盖上地板,唐透镜和旧衣服。泥泞是一个凌乱的过程,如果他们进入你的眼睛,泼溅物可以刺痛。
Advertisement
STEP 2: If you’re not using premixed mud, mix powdered setting mud.
Remove the lid from the bucket of premixed mud. If using powdered setting mud, mix as recommended by the manufacturer, beating until smooth with a heavy duty钻头fitted with a paddle bit.
步骤3:将第一层泥涂到螺杆凹口和工厂倾斜的关节上。
干燥墙面板在它们的长边都有轻微的斜面。当斜面装在一起时,它们形成一个小压痕,沿着关节形成约2英寸宽。使用6英寸胶带刀平滑并均匀地将泥浆均匀地进入关节,填充整个压痕,擦掉多余的泥浆。
Get a pro to do it for you
Receive free, no-commitment project estimates from licensed drywall installation and repair pros near you.

照片:IstockPhoto.com.
STEP 4: Cover the mudded joint with a piece of tape.
在关节上切割并装有一块纸带,而泥浆仍然潮湿,以便“床上用品”。使用6英寸胶带刀轻轻地将纸张光滑到湿泥上,在你去时锻炼泡泡。用刀擦去多余的泥土。
第5步:接下来的内部角落。
With the 6-inch knife, apply a thin coat of mud to both sides of an inside corner, making sure to work it all the way into the center. Cut, fold, and fit a strip of pre-creased paper tape in the corner over the wet mud. Smooth the paper tape carefully in the wet mud, using either a 6-inch taping knife or an inside-corner taping tool that features a preformed 90-degree shape for easy bedding. Use light stroking movements to bed the tape without dislodging it from the corner. Wipe excess mud from the walls.
STEP 6: Apply mud to outside corners next.
If using preformed tape corners, attach them as recommended by the manufacturer, and then smooth mud over the corners, using long vertical strokes on both sides to form a sharp, uniform corner.
STEP 7: Mud butt joints last, if necessary.
当通过使用横跨整个房间的干墙,当干墙板的未锥形端部装配在一起时,可以避免对接接头。但是,如果处理没有倾斜缩进的目的,那么获得光滑的终结更具挑战性。当你做斜面的关节时,他们泥浆,小心只使用尽可能多的泥浆来填充胶带。
Advertisement
第8步:涂上第二层泥。
在应用下一层外套之前,让所有泥浆干燥。将第二层泥涂到螺杆凹口,斜面关节,以及内外角,与第一件涂层的顺序相同,只使用泥浆。无需添加更多磁带!只需涂上一层薄薄的泥浆,擦掉全部过剩。
STEP 9: Apply a second coat of mud to the butt joints, too.
To do a second coat for butt joints, take the 10-inch taping knife, apply two swaths of mud, approximately 8 inches wide, along both sides of the first joint coat,但不在原始关节之上。这是不知不觉地在更广泛的区域上产生墙面深度,以减少庞大的对接接缝的外观。用刀羽毛,刀子很好地展开。
第10步:施加第三和最后一层泥。
在第二层干燥后,涂上第三种非常薄的泥浆。使用10英寸的刀具,用于所有螺纹压痕,接缝和角落。更宽的刀可以让您将泥浆的边缘羽毛到剃刀薄的应用。按照与以前相同的斜角和角落相同的程序。在对接关节上,在以前的条子上涂上一层薄薄的泥土和the original mud joint. It’s not unusual for the mud swath on butt joints to be 2 feet wide or wider.
STEP 11: Do the same over any butt joints.
When the mud dries, apply one last thin coat only over the butt joints. Feather out the edges very well and let the mud dry.
STEP 12: Sand the dried mud at the joints and indentations.
在打磨之前不要让你的呼吸器面膜和护目镜。使用干墙杆砂光机,或者,如果重要的是保持空气灰尘最少,请租用当地建筑租赁店的电源干墙砂光机。砂所有关节和指甲凹口,直到墙壁完全光滑。现在你准备好涂漆或壁纸!
Advertisement
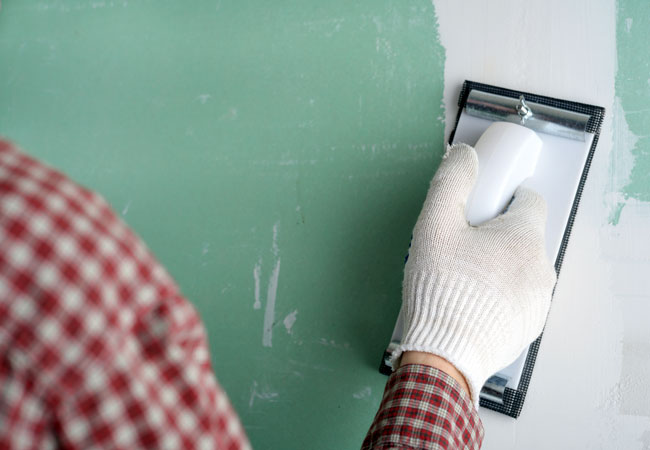
Photo:: istockphoto.com
If you want to use mesh tape to mud drywall…
Unlike paper tape that requires bedding in wet mud, self-adhesive mesh tape is applied over seams and then, when mud is applied, an adequate amount seeps through the mesh into the seam beneath. The order of taping is the same: Do screw indentations and beveled joints first, inside and outside corners next, and butt joints last. If you use mesh tape on flat joints, note that it’s not suitable for corners. Use pre-creased paper tape for inside corners and preformed tape for outside corners.
Get a pro to do it for you
Receive free, no-commitment project estimates from licensed drywall installation and repair pros near you.


